Angular: Render 3D Content using Three.js
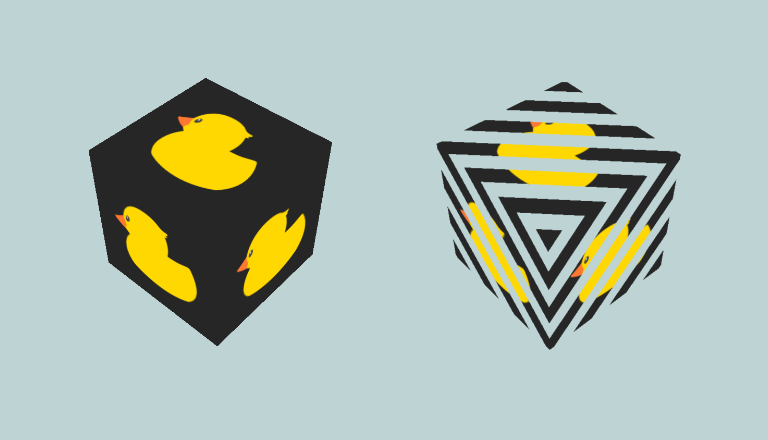
In this article we’ll use three.js, an easy to use graphics library, to render 3D content in an Angular app. We’ll start with a basic textured cube (on the left) and then introduce a shader to add a moving band effect to the cube (on the right).
Check out the full example on GitHub: https://github.com/minibuildsio/ng-three-example.
Pre-requisites
- Knowledge of graphics library fundamentals e.g. scenes, cameras, geometry, textures, etc.
- Familiarity of shaders for the advance section.
Dependencies
Three.js needs to be installed along with @types/three.
npm install three
npm install @types/three
Component
First we need a component to contain code that does sets up the scene, camera, cube, etc and renders them.
export class DuckBasicComponent implements AfterViewInit {

  @ViewChild('canvas') private canvas!: ElementRef;

  private cube!: THREE.Mesh;
  private scene!: THREE.Scene;
  private renderer!: THREE.WebGLRenderer;
  private camera!: THREE.Camera;

  ngAfterViewInit(): void {
    this.initScene();
    this.initCube();
    this.render();
  }

  // ...
}
Component HTML
The HTML for the component is just a <canvas> element. A <canvas> is an element used to draw graphics to a web page in three.js case with WebGL.
<canvas #canvas id="canvas"></canvas>
Initialise the Scene
The initScene() method initialise the:
- Scene - a container for the objects to render e.g. geometry, lights, etc.
- Camera - the window through which we view the scene.
- Renderer - the mechanism that renders the scene to the canvas.
initScene(): void {
  this.scene = new THREE.Scene();
  this.scene.background = new THREE.Color(0xBED3D4);

  let canvasElement = this.canvas.nativeElement;
  let aspectRatio = canvasElement.clientWidth / canvasElement.clientHeight;

  this.camera = new THREE.PerspectiveCamera(50, aspectRatio, 0.1, 1000);
  this.camera.position.z = 8;

  this.renderer = new THREE.WebGLRenderer({ canvas: canvasElement });
  this.renderer.setPixelRatio(devicePixelRatio);
  this.renderer.setSize(canvasElement.clientWidth, canvasElement.clientHeight);
}
Load a Texture and Apply It to a Cube using a Material
Three.js provides the class TextureLoader to surprise surprise load textures from urls. We simply load the texture and pass it to our basic material.
Materials determine the appearance of rendered objects using textures, lighting info, etc. Three.js provides a number of materials for different uses including:
- MeshStandardMaterial for physically based rendering.
- MeshToonMaterial for cel-shader style rendering.
- MeshBasicMaterial simply applies a texture (or solid colour) with no affect from lights this is the one we’ll be use.
To have something to apply the material to we create a cube i.e. a box of size 2x2x2. The cube can be transformed (scaled, translated or rotated), here we rotate it so that it is angled better for the camera. Once the cube is set up we can add it to the scene.
initCube(): void {
  let loader = new THREE.TextureLoader();

  let material = new THREE.MeshBasicMaterial({
    map: loader.load('/assets/minibuilds-icon.png')
  });

  this.cube = new THREE.Mesh(new THREE.BoxGeometry(2, 2, 2), material);
  this.cube.rotation.x = Math.PI / 4;
  this.scene.add(this.cube);
}
Render the Scene
To render a scene we call render(...) on the renderer we created earlier and pass in the scene and camera.
requestAnimationFrame(...) tells the browser to call the supplied function before the new repaint to draw the next frame in our animation.
render(): void {
  this.renderer.render(this.scene, this.camera);

  this.cube.rotation.y += 0.01;

  requestAnimationFrame(this.render.bind(this));
}
Advanced Example using a Custom Shader
The built-in shaders offer a lot of features however sometimes you want to implement a special effect which is where custom shaders come in. Shaders are programs that can modify the geometry (vertex shader) and colour (fragment shader) of an object. Shaders for three.js are written in GLSL (OpenGL Shading Language) a C-style language.
Arguments can be passed to shaders to affect the render for example one or more textures, the time, etc. In the following example we’ll write a shader to add moving stripes to our textured cube as shown on the right in the image at the top of this page.
Vertex Shader
Vertex shaders modify the geometry of an object, they are run called once for every vertex in the geometry. A vertex shader sets gl_Position by transforming the original vertex position based on the projectionMatrix the effect of the camera and the modelViewMatrix the effect of the position and rotation of the object.
Vertex shaders can pass information to the fragment shader in this case we would like the uv for applying the texture and the position to determine the stripes. The term varying here means that value the fragment receives is interpolated from the values of the local vertices.
private vertexShader: string = `
  varying vec2 v_uv;
  varying vec3 v_position;

  void main() {
    v_uv = uv;
    v_position = position;

    gl_Position = projectionMatrix * modelViewMatrix * vec4(position, 1.0);
  }
`;
Fragment Shader
Fragment shaders modify the appearance of an object, the are called for every pixel. A fragment shader sets gl_FragColor using textures, lighting, position, etc. The fragment shader below discards i.e. doesn’t render a pixel if it is in a stripe as determined by position and time otherwise it sets the colour extracted from the texture.
The uniform variables u_texture and u_time are values set on the material and passed to the shader. Uniforms can be updated for example u_time will be updated every frame. The varying variables as discussed above are interpolated variables from the vertex shader.
private fragmentShader = `
  uniform sampler2D u_texture;
  uniform float u_time;
  varying vec2 v_uv;
  varying vec3 v_position;

  void main() {
    if (cos(10.0 * (v_position.y + v_position.x + v_position.z) + 5.0 * u_time) < 0.0) {
      discard;
    }

    gl_FragColor = texture2D(u_texture, v_uv);
  }
`;
Setting Up the Shader Material
To use a custom shader we use ShaderMaterial instead of the MeshBasicMaterial, which requires the vertex and fragment shader source, and uniforms to be provided. The material can be exactly as before.
initCube(): void {
  let loader = new THREE.TextureLoader();

  var uniforms = {
    u_texture: { value: loader.load('/assets/minibuilds-icon.png') },
    u_time: { value: 0 }
  };

  this.material = new THREE.ShaderMaterial({
    uniforms,
    vertexShader: this.vertexShader,
    fragmentShader: this.fragmentShader
  });
  this.cube = new THREE.Mesh(new THREE.BoxGeometry(2, 2, 2), this.material);
  this.cube.rotation.x = Math.PI / 4;
  this.scene.add(this.cube);
}
Rendering and Updating Uniforms
A materials uniforms can be accessed via the uniforms property of the material e.g. to update the time this.material.uniforms['u_time'].value = ....
render(): void {
  this.renderer.render(this.scene, this.camera);

  this.material.uniforms['u_time'].value = Date.now() / 1000 % (2 * Math.PI);

  this.cube.rotation.y += 0.01;

  requestAnimationFrame(this.render.bind(this));
}